Grommet
On this page you can see how to lay up a grommet. The making of the ring itself is not the most difficult part but finishing the ring in a neat way is much more difficult. There are a few pictures which show how this is done. I hope they will be clear enough.
Op deze pagina is te zien hoe een zogenaamde grommer wordt gemaakt. Het Maken van de ring is niet zo moeilijk, het af- en wegwerken van de strengen is het meest lastige gedeelte. Met een aantal foto's hoop ik te laten zien hoe dat in z'n werk gaat.
Grommer

You need a piece of 3 or 4 strand rope about 3½ or 4½ times (depending on the number of strands in the rope) the circumference of the grommet in length. Most of the time a three strand rope is used.
Voor de grommer heb je een stuk 3 of 4 strengs touw nodig dat, afhankelijk van het aantal strengen in het touw, ongeveer 3½ of 4½ keer de omtrek van de grommer lang is. Meestal wordt 3 strengs touw gebruikt.

To make the grommet only one strand of the rope is used. You should carefully unlay one strand and prevent it from fraying by putting on some tape on both ends.
De grommer wordt van slechts één streng van het touw gemaakt. Hiertoe wordt voorzichtig één streng uit het touw gedraaid. Tape deze tijdelijk even af zodat hij niet uitrafelt.
Form a ring the desired diameter in the middle of the strand and cross the strands as shown in the picture.
Vorm in het midden van de streng een ring ter grootte van de te maken grommer. Kruis de strengen zoals op de foto is te zien.
Now pass the working ends about themselves until they meet again. This is the first circuit. Make sure you give a little twist to the strand each time you go round. In this way the strand will lay up nicely and the original shape of the rope will be completely recovered.
Leg nu voozichtig de streng om zichzelf heen tot dat beide einden weer bij elkaar komen. Zorg ervoor dat je de streng steeds een beetje in elkaar draait zodat het touw zijn originele vorm weer geheel terug krijgt.
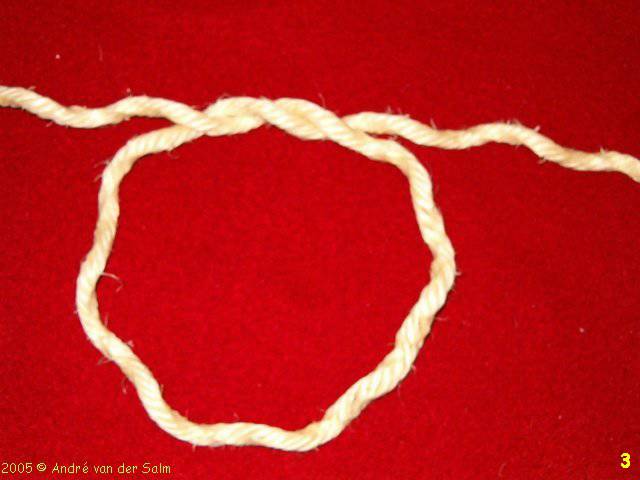
Go around once more until both working ends meet again. This is the second circuit.
Herhaal de stap van de vorige foto totdat de werkende einden weer bij elkaar komen.

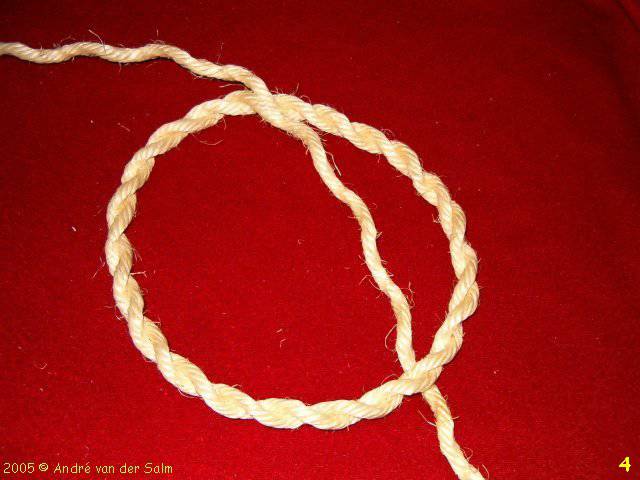
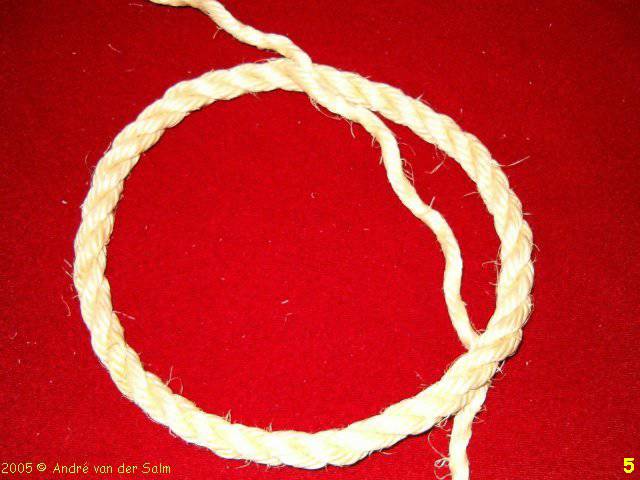
A third circuit needs to be made. When finished you should have the original rope back in circular form.
Er wordt nog één keer rondgegaan zodat we het originele touw als het ware weer terug krijgen.
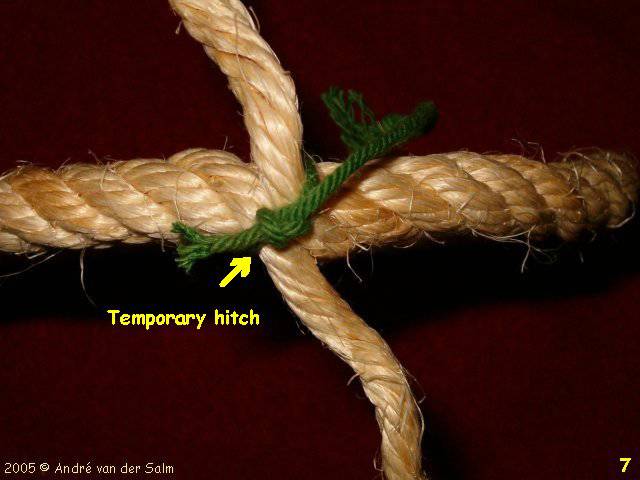
You can put on a temporary hitch. In this way you can easily split the working ends in half while the rest of your work won't mess up.
Voor het gemak kan je een tijdelijk bindseltje aanleggen zodat je gemakkelijk de werkende einden kunt halveren. De grommer blijft nu netjes in vorm.

Before we can finish the grommet we have to divide both working ends in two equal parts.
Voordat de grommer kan worden afgewerkt worden beide werkende einden in twee gelijke delen verdeeld.
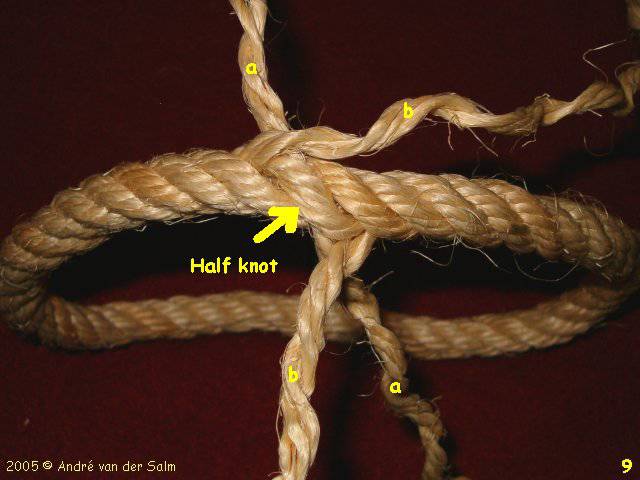
To finish the grommet a half knot is made with two halves of the working ends. Make sure that the two remaining parts stay on top.
De afwerking wordt begonnen met een halve knoop. Zorg ervoor dat de overblijvende helften van beide werkende einden aan de bovenkant blijven..

The two (half) working ends are spliced in the same way as one would do in a long splice. That is, going over one and under two strands. (see dots in picture)
De twee (halve) werkende einden worden weggesplitst net zoals bij een lange splits wordt gedaan. Er wordt steeds over één en onder twee strengen door gegaan. (zie stippen op foto)

Using a (Swedish) Fid will make the splicing a lot easier.
Het gebruik van een fit of nalapriem maakt het splitsen een stuk gemakkelijker.

You can cut off the ends after you have spliced the strands three times. Roll the grommet a couple of times under your foot... ready.
Na drie keer door splitsen worden de einden netjes kort afgesneden. Rek de grommer voorzichtig op en rol hem onder je voet om hem nog beter in vorm te krijgen.
Maak jouw eigen website met JouwWeb